Export Spotify Library and Playlists to Azure
After years of being an avid Spotify library and playlist curator, I have on more than one occasion worried about the possibility of my library or playlists being lost. So, I decided to export them for my own personal backup using PowerShell and Azure, and will show you how you can too.
Background
5 years of music
I first registered for Spotify Premium in February of 2016, and it completely changed the way I consumed music. After years of digging through YouTube videos, random physical media, and “AI Radio” sites like Pandora I finally had full access to the world’s library, with one of the best user experiences I’ve ever had with any digital product. Since then, Spotify’s yearly Wrapped insights tell me I spend around 60,000 minutes (42 days!) per year listening to music on their service. This is in addition to countless more spent organizing my 70+ playlists, looking up songs I’ve heard in mixes, and “Shazam-ing” songs I hear live to save to my library. Spotify truly is at the heart of my music-consumer life.
Backup is required for anything important
To be completely clear, I have no thought or impression that Spotify will ever shutter their doors and take their service offline. With 345 million monthly active users, they have become the defacto music-streaming service for most of the world. However, that does mean it is impossible. Database corruption, account termination, service unavailability, and user migration to alternate services are all potential risks that I have to mitigate when considering the importance of my Spotify account data. I thought, “How do I protect important data, regardless of format?”. The answer is always replication and backup.
My thoughts on third-party Spotify exporters
If you are starting to feel like me, and wondering how you can protect your thousands of songs and playlists, we aren’t alone. A quick search for “Spotify library exporter” returns around 64,000 results, including plenty of online services that will do all the work for you and give back a text file or Excel spreadsheet in a couple seconds. But in doing this, you are granting access to and trusting your Spotify account data with whatever online service you decided to utilize. As a security-conscious internet user, and as an engineer, I decided that I could (and should) create my own solution.
My self-hosted solution
The manner by which arbitrary online services are able to export Spotify user library and playlist data is by utilizing Spotify’s amazing Web API, which is free and available to anyone with a Spotify account though the Spotify Developer program. If they can do it, so can I, with a little help from my two favorite tools - PowerShell and Azure.
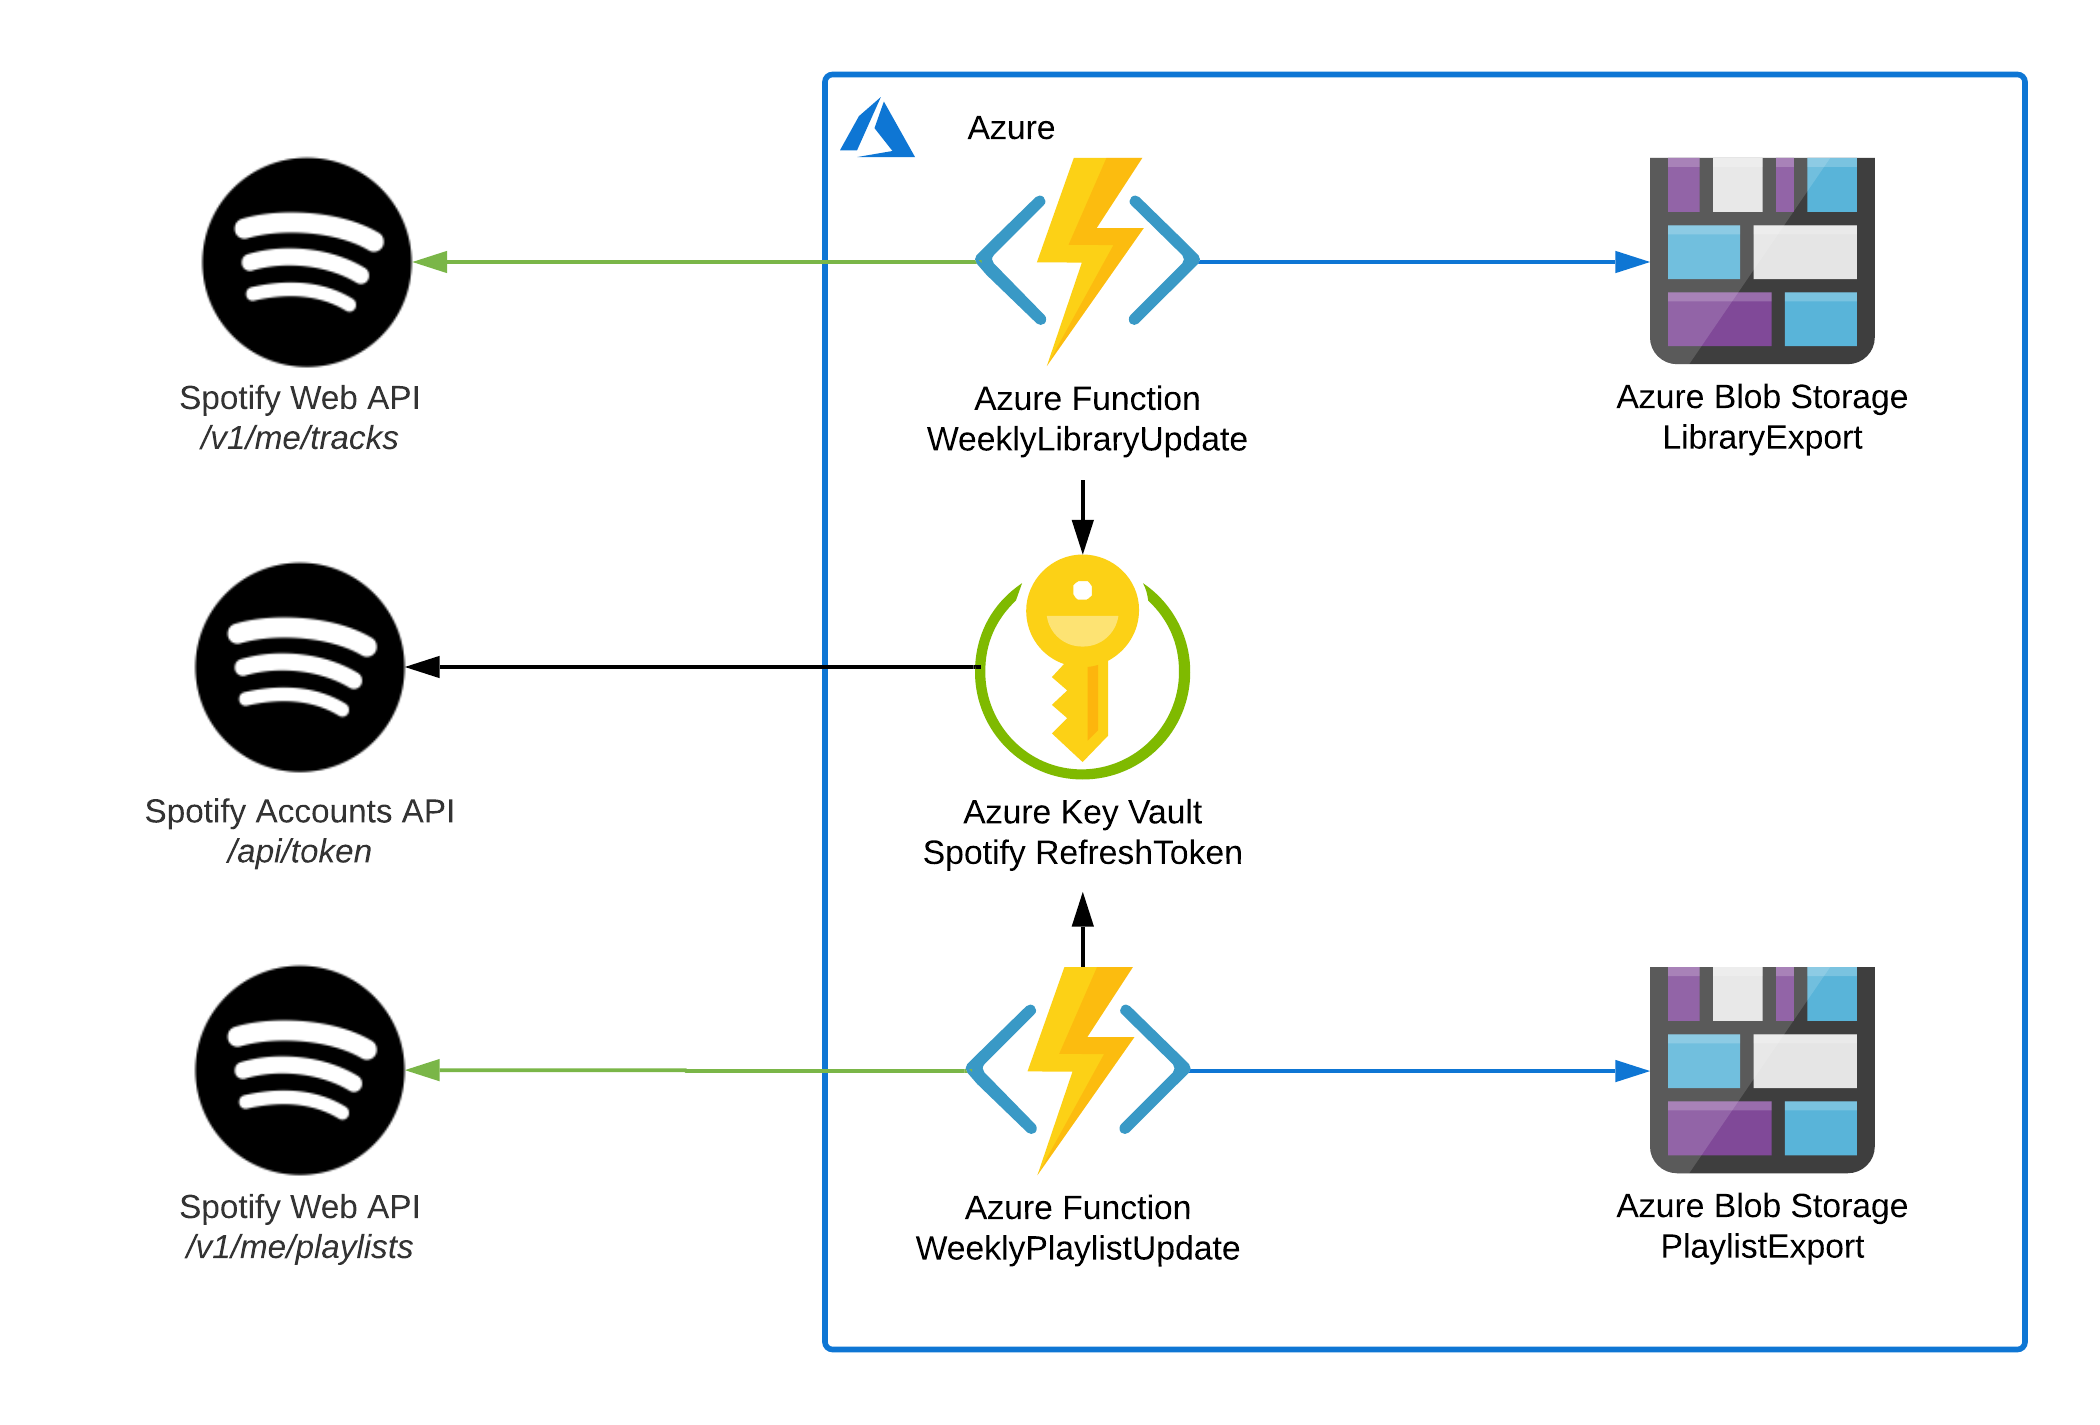
Solution Architecture
I want to export my Spotify library and playlists on a schedule for two reasons: so I always know when my backup will run, and so I can have point-in-time “snapshots” of my Spotify profile, enabling me to see how my taste changes over time. However, I don’t want to maintain, update, and patch a VM for it to just sit around 99.99% of the time waiting for my scheduled job to run. Likewise, I don’t want to have to configure an entire PaaS automation service just to execute a simple PowerShell script, or pay for a relational database service just to store CSV data. Enter Azure Functions and its Azure Blob Storage output binding.
Azure Functions
Azure Functions is a Serverless compute service provided by Azure that allows for on-demand code execution billed at per-second consumption rates. You are only charged for the time your code is executing, and given that Microsoft provides 1 million free executions per month, you can rest assured that you won’t be paying for the compute it takes to backup your Spotify library each week. PowerShell, among many others, is an Azure Functions supported language, meaning the Azure Functions framework can execute arbitrary PowerShell code on-demand.
Azure Blob Storage
Azure Blob Storage is Microsoft’s storage service that offers near-infinite object storage within the Azure cloud. Think of it as an unlimited “Dropbox” or “Google Drive” that you can use to store any type of data, and can be integrated seamlessly with other Azure services like Azure Functions. Blob Storage is perfect to store the CSV files that our Functions generate because it’s simple to use and – like Azure Functions – it’s nearly free. Given that my library of nearly 2,000 songs only takes up 500kb per weekly export, the space to store your Spotify backups won’t break the bank either.
Azure Key Vault
Azure Key Vault is a secure cryptographic key, secret, and certificate storage service from Microsoft that gives you a safe place to store Application Credentials, API Keys, Machine Certificates, etc. for use by other Azure resources (as well as non-Azure resources). To access the Spotify API, you need to use a set of Application Client Credentials to obtain an API key that is used to export your library. Azure Key Vault is the perfect place to store these secrets, as it integrates seamlessly with Azure Functions to provide secure access to the Spotify API without having to store API keys within the code. Like every other service I’ve mentioned so far, Azure Key Vault is essentially free.
Implementation Details
Now that all the architecture and background are established, I can finally get into the fun stuff – how it all works.
Prerequisites
Given that you are reading an article like this one, and have made it this far, I’m going to assume you have a basic understanding of all of the technologies that I’ve discussed. Before you can get to using the code I’ve written, you’ll have to already have (or set up) a couple things:
- A free Azure Account
- A free Spotify Developer Account
- An Azure Key Vault – follow the Microsoft quickstart
Authenticating to the Spotify Web API
Register an app
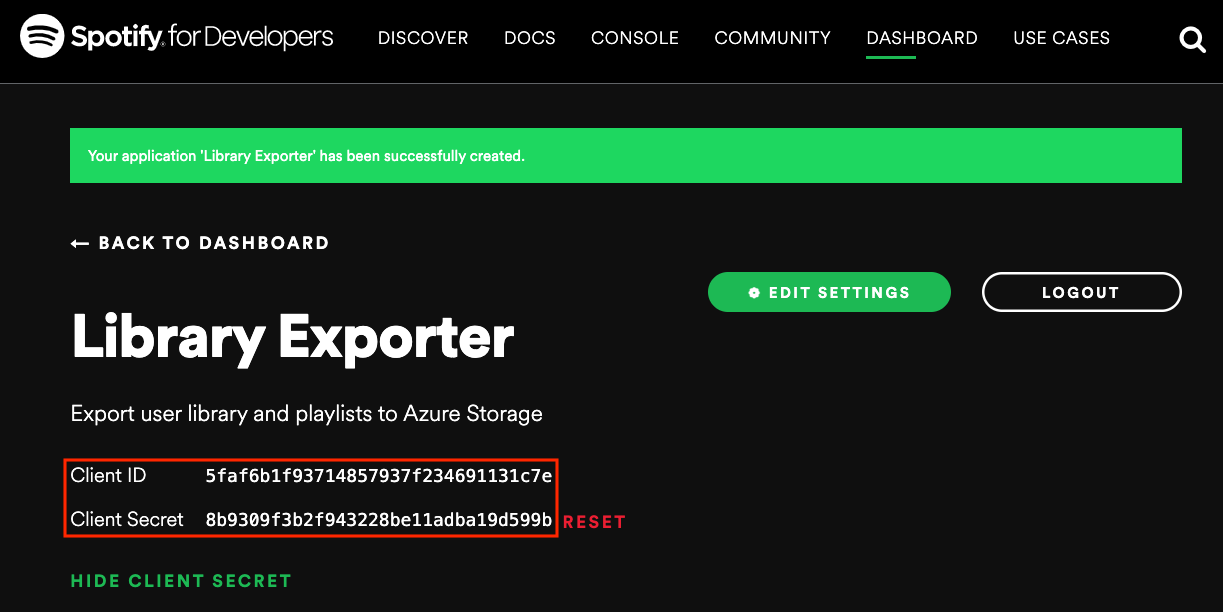
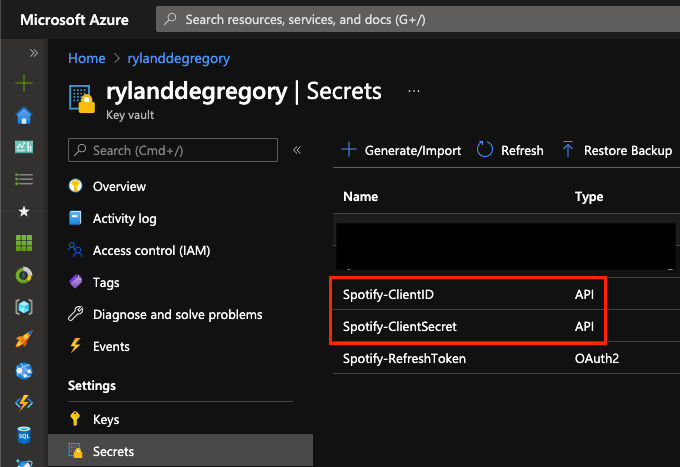
To authenticate to the Spotify Web API, your Azure Functions need two things: application credentials and user credentials. Application credentials are granted by registering an App with your Spotify Developer account. Once you have the Client ID and Client Secret, you should store them in Azure Key Vault as Secrets named Spotify-ClientID and Spotify-ClientSecret, respectively.
Use the Authorization Code Flow to obtain an OAuth 2 Refresh Token
Now that you have your Spotify app credentials, you should follow the steps in my Spotify Web API Auth repo to generate an OAuth2 Refresh Token. There you will find a single-file Node.js application that generates a web page where you can grant your app access to view your user profile (or anyone else who logs in using your app).
Once you have authorized your app with your profile, the web page returns an OAuth 2 Refresh Token that will be used by the Azure Functions to query your user profile data. Store the OAuth 2 Refresh Token as an Azure Key Vault Secret named Spotify-RefreshToken.
The good news is, you will probably only have to do that once, as OAuth 2 Refresh Tokens are very long-living.
Provision Azure Resources
Create the Azure Function App and Storage Account
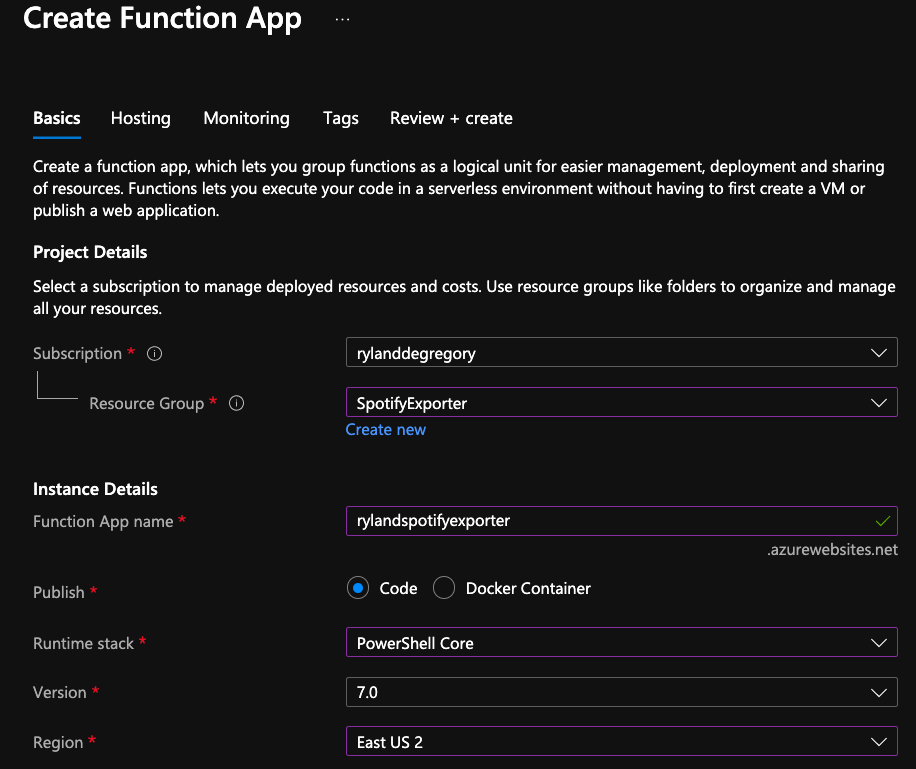
Once your Spotify App is registered and you have granted the application access to read your user profile, you can then set up the Azure Functions that will automatically use the credentials you generated. Connect to the Azure Portal and create a new Function App.
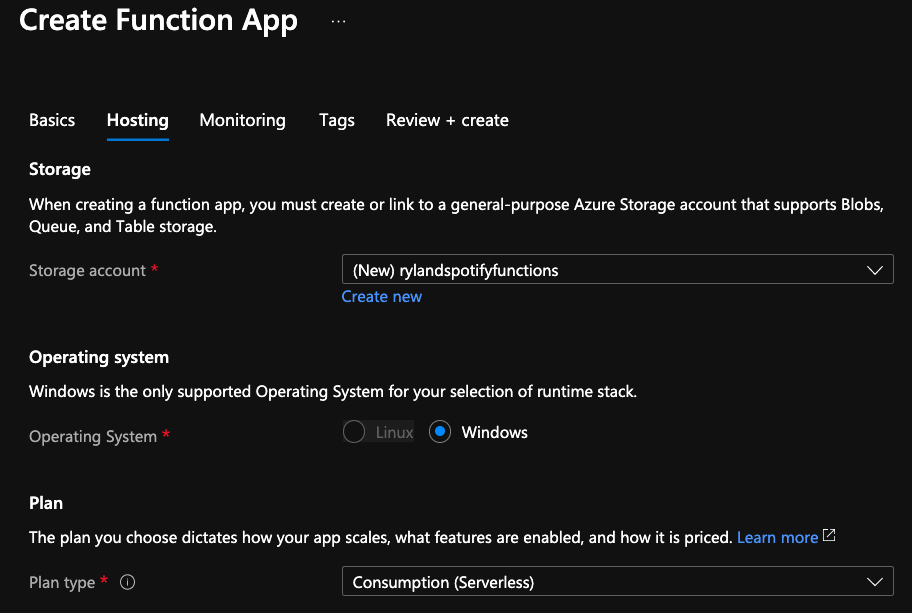
Fill out the basic settings, create a new Storage Account that will store your exported data, and make sure that you’re using the Consumption (serverless) plan. Leave the rest of the values as their defaults and click Create. (Click on the screenshots below to view larger size)
Configure the Function App
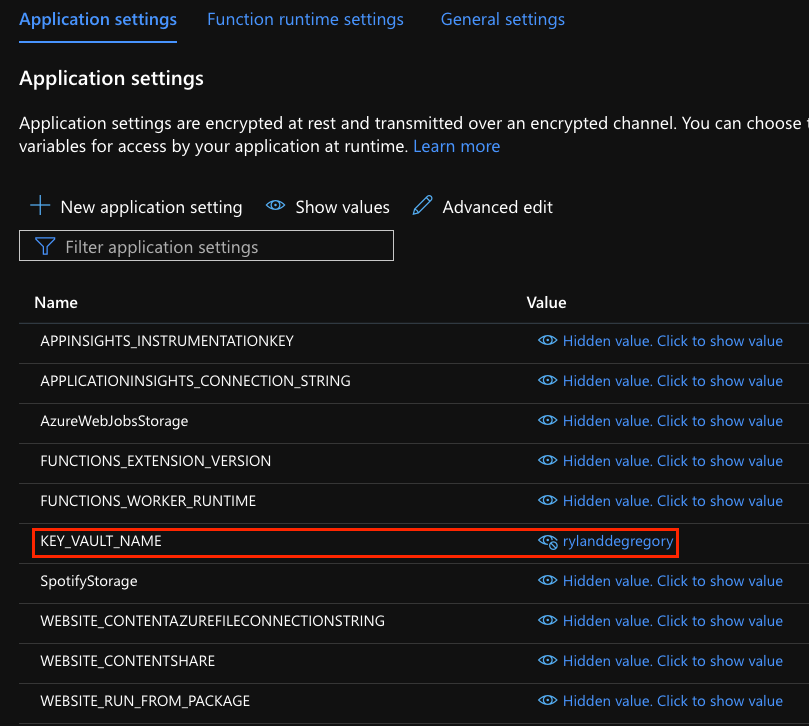
Navigate to the new Function App and then to the Configuration blade. Add a new Application Setting named KEY_VAULT_NAME and set the value to the name of your Azure Key Vault. This Application Setting is used to tell the PowerShell code which Key Vault to look for the Spotify API Secrets in.
Now, navigate to the Identity blade and enable the System assigned Managed Identity for the Function App. Copy the Object ID of the Managed Identity to your clipboard.
Ensure the Function App can access your Key Vault
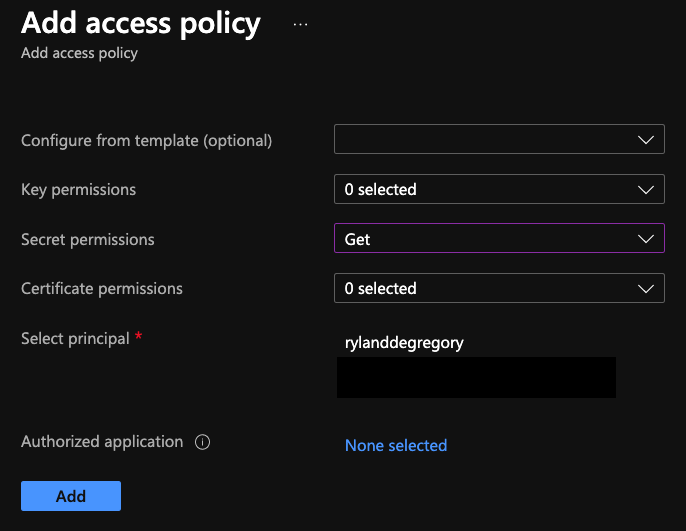
Within the Azure Portal, navigate to the Resource page for your Azure Key Vault. Go to the Access policies blade and click “+ Add Access Policy”. Add Get within Secret permissions, then “Select principal” and paste in the Object ID of the Function App’s Managed Identity. Click “Add”, then “Save” to add the Access Policy.
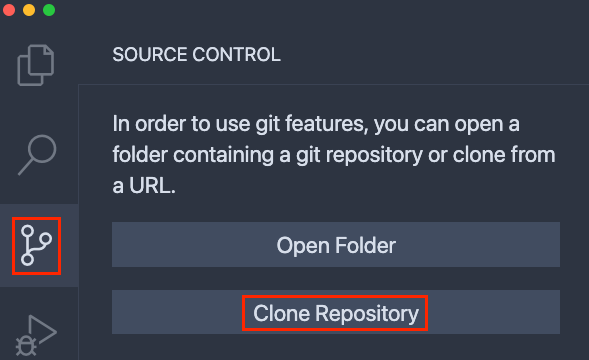
Clone the SpotifyExporter git repo
If you haven’t already, navigate to the SpotifyExporter GitHub repo and clone it to your local machine using VS Code. You’ll also need the Azure Functions Extension.
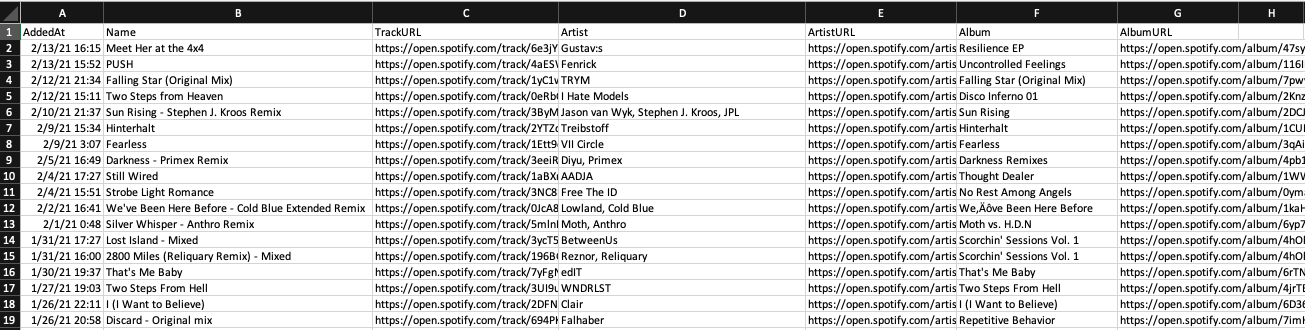
By default, I capture the track name, artist, album, and time added for all songs within the user library. For songs within playlists, I also capture the playlist name and which user account added the song to the playlist (useful for collaborative playlists).
If you want to export more, less, or different attributes, you can! First, determine the attributes that you want to capture by viewing the full list in the Spotify Developer Documentation. Then, edit both the $TrackFields variable to include your updated attributes, as well as the [PSCustomObject] that is generated for each track (i.e. each element) in the $TrackArray variable to capture the updated attributes into the output CSV.
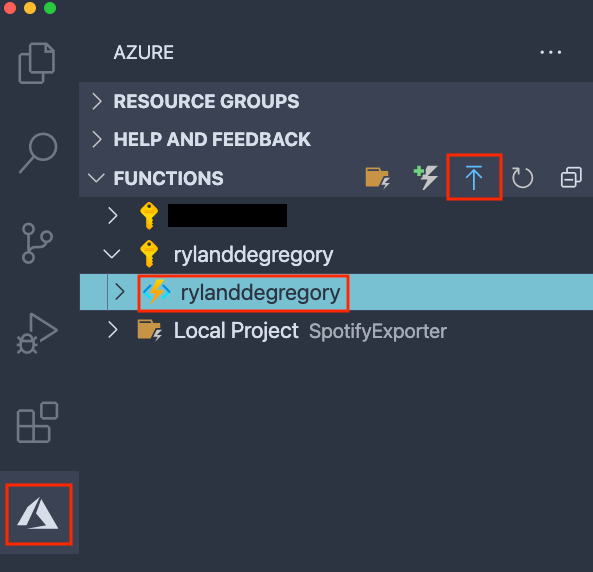
Publish the PowerShell code to Azure Functions
If you are happy with the code, you can publish the local Azure Functions Project to the Function App you previously created. From the Azure Functions extension, select your Subscription, then your Function App. Click Deploy to Function App… and follow any prompts within VS Code.
Results and next steps
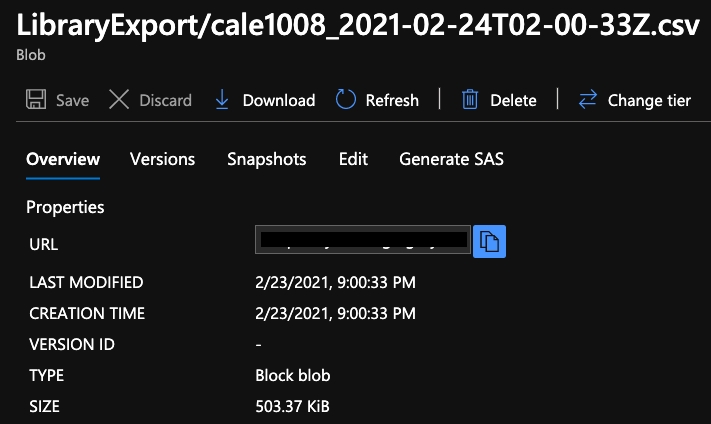
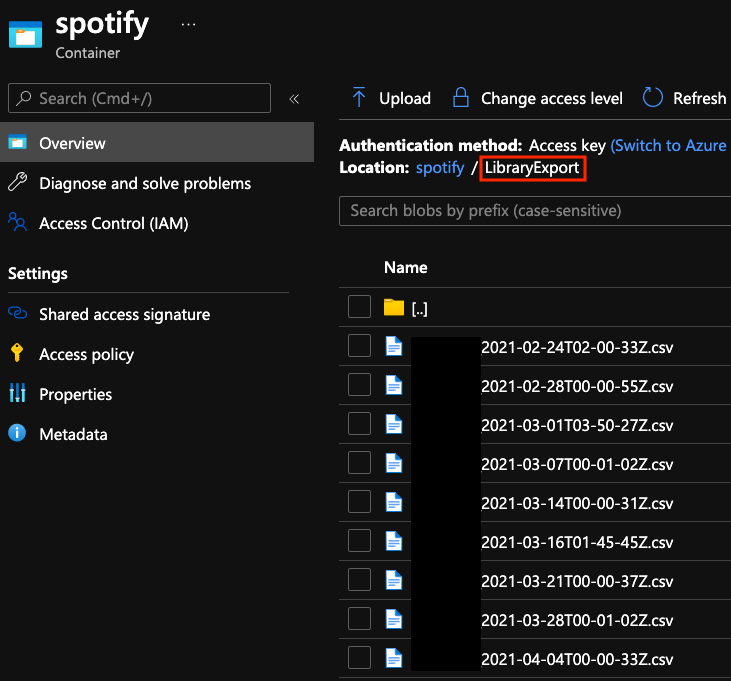
Now that you have your Spotify Exporter Functions up and running, they will (on a weekly basis) export your Spotify user library and all playlists to two CSV files within the Azure Storage Account you created with the Function App. The files will be in a blob container named spotify, and will be named based on the date and time the export ran.
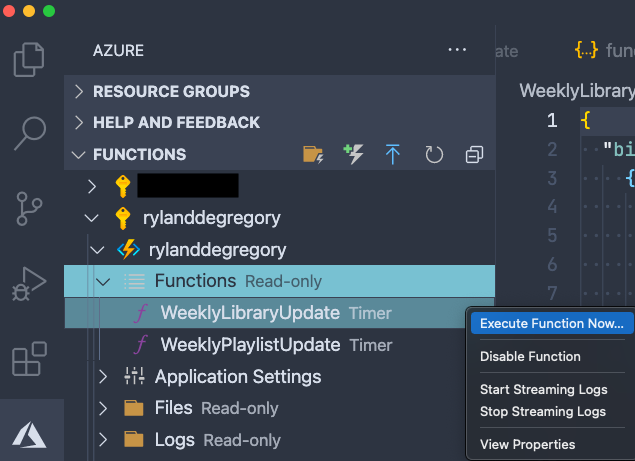
You can also trigger either of the Functions on-demand by opening the Azure Functions extension and Right-Clicking on the name of the Function you want to execute.